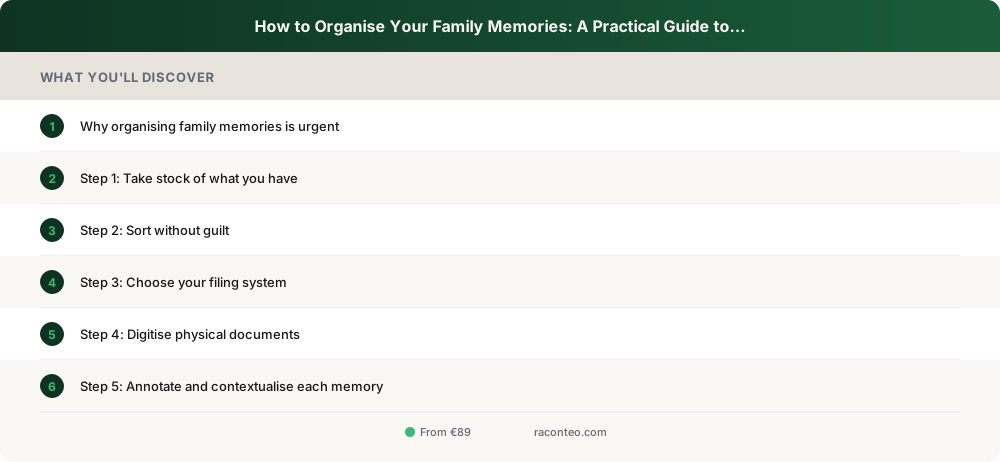
How to Organise Your Family Memories: A Practical Guide to Preserving What Matters
How to organize family memories, old photos, and documents? A complete guide with practical methods to preserve your family history for future generations.
How to Organise Your Family Memories: A Practical Guide to Preserving What Matters
Table of Contents
- Why organising family memories is urgent
- Step 1: Take stock of what you have
- Step 2: Sort without guilt
- Step 3: Choose your filing system
- Step 4: Digitise physical documents
- Step 5: Annotate and contextualise each memory
- Step 6: Store and back up for the long term
- Common mistakes to avoid
- The Raconteo solution: turning your archives into a living story
- Frequently asked questions
One Sunday afternoon, clearing out your parents' attic, you open three cardboard boxes. Inside: hundreds of loose photos, yellowed letters in cramped handwriting, a worn notebook, a few military medals in a tin. And then the question hits you — where on earth do you begin?
Organising family memories is one of those projects everyone puts off. There's never a good time, it always feels overwhelming, and the fear of "doing it wrong" keeps you frozen. Yet every year that passes puts these treasures at greater risk. Photographs fade, paper becomes fragile, and — most critically — the people who could give meaning to all of it grow older and eventually leave.
This guide is here to help you turn an intimidating project into something concrete, enjoyable, and lasting.
Why organising family memories is urgent
The physical deterioration of archives
Silver-halide photographs from the 1960s–1990s have a limited lifespan. Without proper protection, they begin to fade within 30 to 50 years. Paper documents — letters, certificates, notebooks — deteriorate with humidity, light, and temperature fluctuations. Anything sitting in an uninsulated loft is ageing faster than you'd like to think.
But the most silent danger is human: the people who know are becoming fewer. Your mother can identify every face in her childhood photos. In ten years, she may no longer be able to. Names, dates, places, context — this information cannot be recreated once it's gone.
The scattering that happens during life transitions
Family memories are most often lost during major life transitions: a parent moving to a care home, an estate being settled, the family home being sold. Things get thrown away by mistake, boxes go missing, documents end up in a skip. Acting before these turbulent moments is always better than acting after.
For more on this, read our article on how to preserve memories of elderly people before it's too late.
Step 1: Take stock of what you have
Before sorting, you need to know what exists. This first step is consistently underestimated — and that's a mistake.
Categories of memories to identify
Written documents
- Letters and correspondence
- Diaries, notebooks, school exercise books
- Official papers: birth, marriage and death certificates, diplomas
- Military service books, old passports
- Invoices, contracts, period newspapers
Images and video
- Black-and-white photographs, slides
- Colour prints from the 1970s–2000s
- Super 8 films, VHS tapes, cassettes
- Digital photos stored on hard drives, USB sticks, CD-ROMs
Objects and artefacts
- Family jewellery
- Medals and decorations
- Period clothing (wedding dress, military uniform)
- Annotated books, family bibles
- Trade tools
The quick inventory method
Don't sort yet — simply record what you find. Take photos of each pile and each box. Create a simple spreadsheet: storage location, type of content, approximate period, condition. This overview will let you prioritise without feeling paralysed.
Step 2: Sort without guilt
Sorting is the most emotionally charged step. You hesitate to throw things away, feeling a kind of betrayal towards those who are gone. Here are a few principles to help you move forward without getting stuck.
The three-pile system
Pile 1 — Keep without question Unique documents (certificates, letters), identified photos, objects with strong personal or family significance. These will be digitised and protected.
Pile 2 — Keep if possible Duplicate photos (keep the best copy), redundant documents, objects whose significance is uncertain. Check with a family member before deciding.
Pile 3 — Let go Duplicates in poor condition, documents with no memory value (ordinary bills, old adverts), damaged objects with no identifiable significance. Letting go is also a way of honouring what is worth keeping.
Involve the family
Sorting is a collective project. Bring in parents, siblings, and above all the older generation — they will be your best source of identification. A family sorting session on a Sunday can become something precious in itself: photographs spark stories, objects revive anecdotes. Document these moments — record the conversations, note the names and memories that surface.
Step 3: Choose your filing system
There is no universal system. What matters is choosing a logic and sticking to it.
Chronological filing
The most intuitive method: organising by date. Ideal when you have good temporal continuity and know the approximate dates of most documents.
Sample structure:
- Before 1900 (known origins)
- 1900–1939 (grandparents)
- 1940–1959 (war and post-war)
- 1960–1979 (parents, youth)
- 1980–1999 (your generation)
- 2000 to present
Thematic filing
Ideal when dates are uncertain, or when you want to group elements that "belong together": everything related to weddings, travel, a particular period like immigration or military service.
Possible categories:
- Portraits and people
- Houses and places
- Celebrations and gatherings
- Travel and outings
- Work and professions
- Official documents
Filing by family branch
Useful in families with several important branches (mother's side / father's side, different geographic branches). Each branch gets its own folder, organised chronologically or thematically within.
| Method | Strengths | Best suited when... |
|---|---|---|
| Chronological | Clear timeline | Dates are known |
| Thematic | Organised by subject | Dates are uncertain |
| By branch | Family clarity | Multiple distinct branches |
Step 4: Digitise physical documents
Digitising is the insurance policy for your archives. A fire, a flood, a careless house move — and the originals are gone. Digital files, by contrast, can be copied indefinitely.
Available tools
Flatbed scanner Ideal for paper documents and photographs. Recommended resolution: at least 600 DPI for photos, 300 DPI for text documents. Entry-level models (around £60–80) produce excellent results.
Film and slide scanner Essential if you have 35mm slides or negatives. More expensive, but specialist scanning services exist if you'd prefer to outsource this.
Smartphone scanning app For large volumes or three-dimensional objects, apps like Microsoft Lens, Google PhotoScan, or Adobe Scan offer acceptable quality with great convenience. Perfect for an initial quick pass.
Professional services For large volumes or if you prefer to delegate, specialist companies will scan your photos and slides. Expect to pay between 20p and 80p per image depending on the quality required.
File naming conventions
A poorly named file is as hard to find as an unfiled document. Adopt a consistent convention from the start:
YYYY-MM_Short-description_Firstname-Lastname.jpg
Examples:
1962-07_Parents-wedding_James-Helen-Morgan.jpg1944-00_Military-service-book_Peter-Morgan.pdf1975_Brittany-holiday_Family.jpg
Step 5: Annotate and contextualise each memory
Digitising without annotation is a half-finished job. In twenty years, your children will look at these digital photos and know no more about who is who than if they'd found the originals in a box.
File metadata
Most image formats (JPEG, TIFF) allow you to embed information directly in the file through EXIF/IPTC metadata. Software like digiKam (free) or Adobe Lightroom lets you add: date, location, names of people pictured, description.
This information travels with the file — it doesn't get lost.
The accompanying text file
For each folder or group of documents, create a simple text file (.txt or .md) recording the context:
- Who is in the photos, and in what order
- The occasion, location, approximate year
- The anecdote or memory associated with it
- Your source (who told you)
Getting the older generation to talk
This is the most valuable part of the whole project. Sit down with your parent or grandparent, photos in hand (or on screen), and let them talk. Record the audio or video. These recordings are often richer than any text annotation. See our guide on how to interview your grandparents for practical advice on this step.
Step 6: Store and back up for the long term
The golden rule is the 3-2-1 rule:
- 3 copies of every important file
- on 2 different types of media
- with 1 stored off-site (or in the cloud)
Physical media
External hard drives are convenient but fragile (drops, mechanical failure). Prefer SSDs for long-term storage. USB sticks are not reliable for long-term preservation — avoid them as a primary backup medium.
DVD-R or archival Blu-ray (M-DISC) discs offer excellent theoretical longevity (several decades) at low cost.
Cloud storage
For off-site copies, cloud services are ideal: Google Photos, iCloud, OneDrive, or Dropbox. Note: check the terms of service around file retention, and always keep a local copy as well.
Keeping archives alive
A static organisation system degrades over time. Plan an annual review: check file integrity, add new memories, update annotations.
Common mistakes to avoid
Digitising without annotating — Thousands of scanned but unlabelled photos are almost as useless as photos in a box.
Relying solely on the cloud — Services shut down, accounts get deleted. Cloud is one copy among several, not a system in itself.
Working alone — Elderly family members are your primary information source. Work with them while they can still help.
Keeping everything — The paralysis of sorting leads to keeping everything, and ultimately nothing is truly accessible. Sorting is a way of honouring what deserves to be honoured.
Putting it off — The classic trap. This urgent-but-not-urgent project always gets pushed back, until it's too late.
For more, read our guide on how to create a family biography.
The Raconteo solution: turning your archives into a living story
Organising your memories is a great start. But the real question is: what do you do with them next?
Well-filed photos and annotated files are accessible heritage — but they are still an archive. They are not yet a story. And that is the real difference: families don't remember through archives, they remember through stories.
Raconteo was built precisely for this transition — from a scattered collection of memories to a structured, living, transmissible story.
Here's how it works: a loved one (or you yourself) answers guided questions by theme — childhood, family, work, emotions, values. Raconteo's AI transforms these answers into narrative chapters, in the person's own style and voice. The result can become a printed book, a PDF, or both.
What Raconteo gives you that archives alone cannot:
- Narrative context: instead of a photo from 1962, a story about what that day meant
- The person's voice: their words, their expressions, their humour — not an academic write-up
- Structure: a readable, organised narrative, not a list of files to wade through
- Legacy: something your grandchildren can hold in their hands in 40 years
Your organised memories become the raw material for the story. Raconteo helps you turn them into something lasting.
Discover Raconteo and get started →
Frequently asked questions
Where do I start when I'm completely overwhelmed?
Start small. Pick one single box and work through it completely before moving to the next. The temptation to "see everything first" is a trap — it leads to paralysis. One box properly sorted is worth more than ten boxes half-started.
How do I identify people in old photos with no help?
If no family member can identify the people, a few approaches help: look at clothing and hairstyles to approximate the date; check the back of photos (period photographers often noted the location and year); compare with other dated photos to recognise faces. Facial recognition tools can help, but be careful with family data.
What resolution should I use for scanning photos?
For a photo intended to be enlarged and printed, aim for at least 600 DPI. For photos that will only be viewed digitally, 300 DPI is sufficient. For slides and negatives, use 1200 to 2400 DPI. Better to scan at high resolution and reduce later than the reverse.
How can I involve elderly relatives without exhausting them?
Keep sessions short (30–45 minutes maximum), on a comfortable medium (large screen or printed copies rather than a smartphone). Prepare a selection of photos in advance — not hundreds. Always record with their consent. And above all: don't rush — let memories surface naturally. The digressions are where the richest material often lives.
How do I organise digital photos on my phone?
Start with regular exports to a hard drive and a cloud service. Create thematic or chronological albums in your photo app. And crucially: label or tag the people in the metadata while you still remember — don't leave this step for later.
Should I keep originals after digitising, or can I discard them?
It depends on the intrinsic value of the item. Official documents, handwritten letters, and objects have irreplaceable physical value — keep the originals. For photos in poor condition that you have a good digital copy of, or documents with no particular significance, letting go of the originals is reasonable. The rule: if the object itself has value (not just its content), keep it.
Want to go further and turn your organised memories into a real family book? Raconteo guides you from the first question to the printed book.